Everything you need to run better client portals.
Learn how to connect ClickUp, create client portals, control what clients see, collaborate on work, manage requests, track time, and understand client activity.
How ClientDoq works
ClientDoq gives clients a dedicated workspace for work you already manage in ClickUp. Your team keeps working in ClickUp while each portal exposes only the information and collaboration you choose to make client-facing.
Connect ClickUp
Authorize ClickUp and select the workspace available to a portal.
Create a portal
Set up a dedicated client-facing workspace with its own settings and branding.
Control visibility
Choose the ClickUp data and client-facing features exposed through the portal.
Work together
Keep comments, requests, progress, and tracked time connected to the work.
Your ClientDoq dashboard
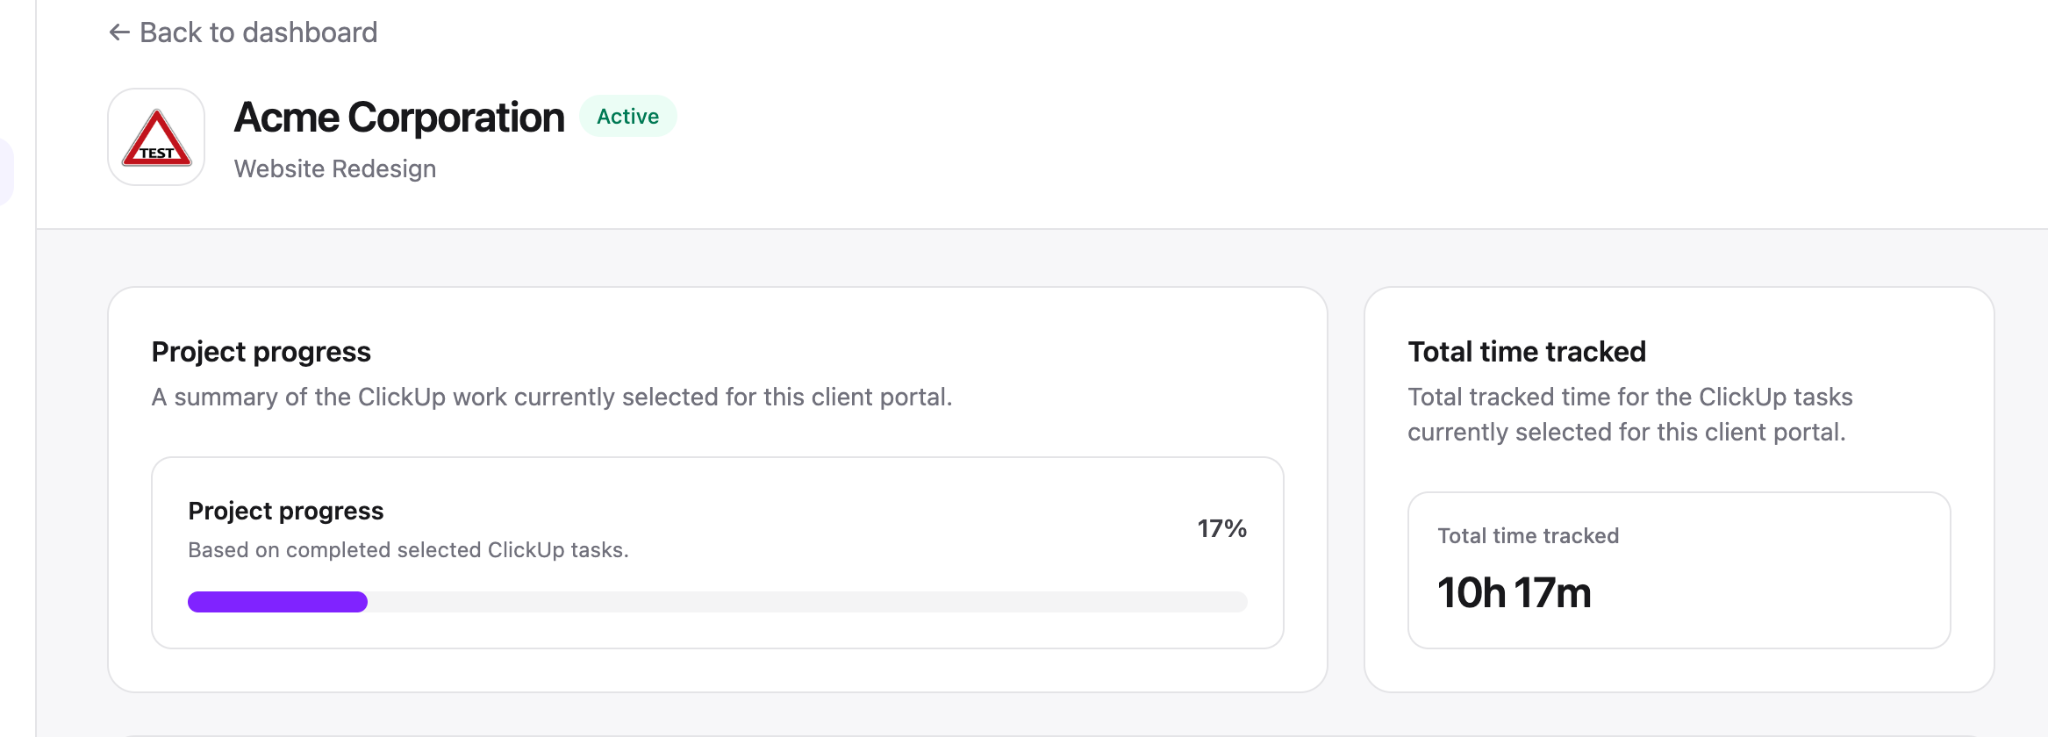
The admin dashboard is the starting point for managing client portals. From here you can create portals, open existing portals, and review client activity and requests.
Create a client portal
A portal represents the client-facing workspace you want to provide. Start with the client information, then connect ClickUp and configure what the portal exposes.
- Open the dashboard.
Choose Create portal. - Enter portal information.
Add the portal name, client contact, description, and primary color. - Configure ClickUp.
Connect the appropriate authorization, select a workspace, and choose the data for the portal. - Configure visibility.
Choose which portal features such as tasks, progress, statistics, time tracking, comments, and task links are enabled. - Review the client view.
Use the portal preview to verify the experience before sharing it.
Portal preview
Preview the client-facing experience while configuring a portal so you can verify the information and features that will be exposed.
Connect ClickUp
ClientDoq uses ClickUp authorization to retrieve the workspace information needed by your portals. The authorization is separate from the settings that determine what each portal exposes.
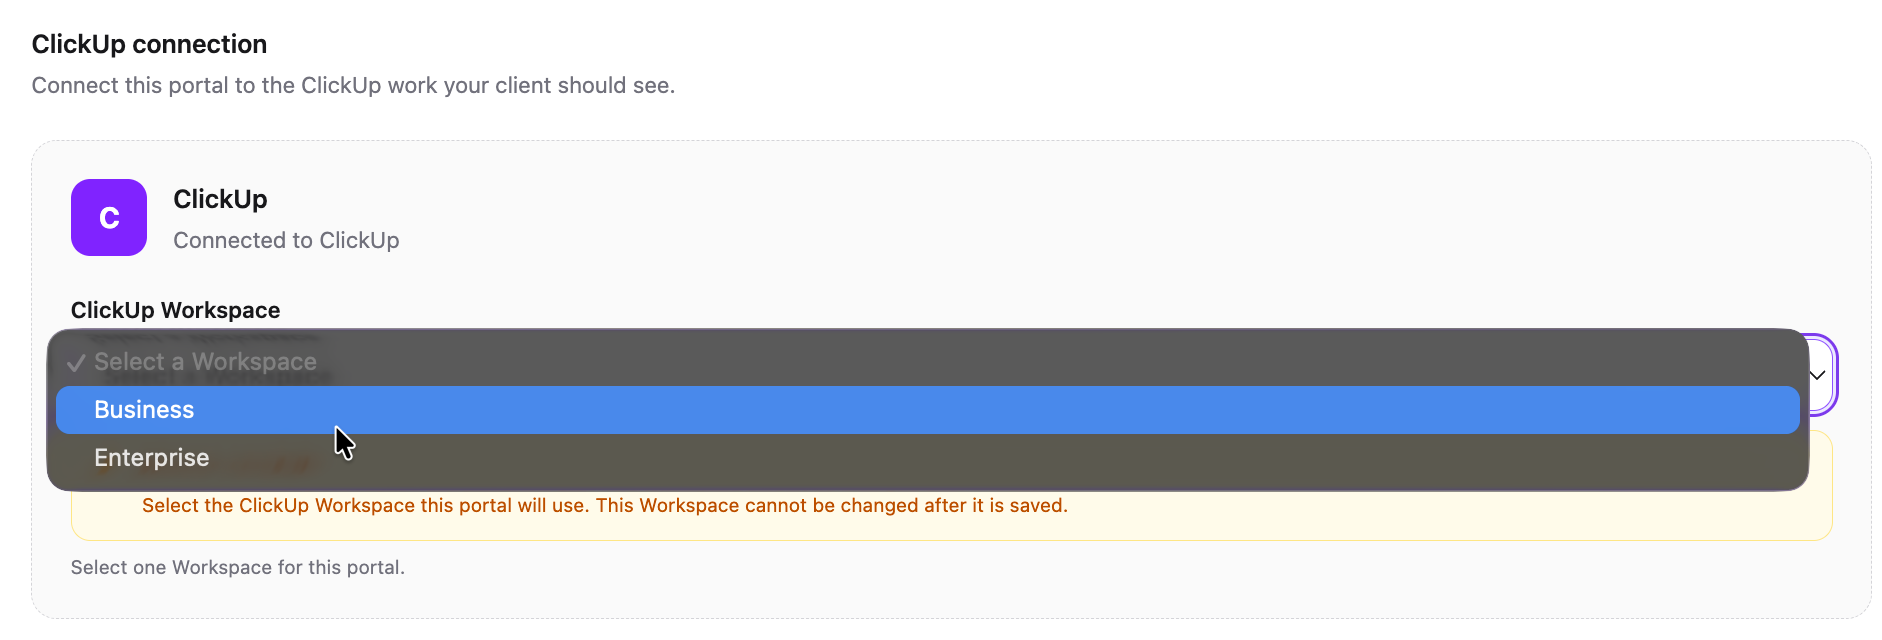
Authorize a ClickUp Workspace
After connecting ClickUp, ClientDoq can determine which workspaces the authorization can access. Select the workspace appropriate for the portal you're configuring.
Select Spaces, Folders, and Lists
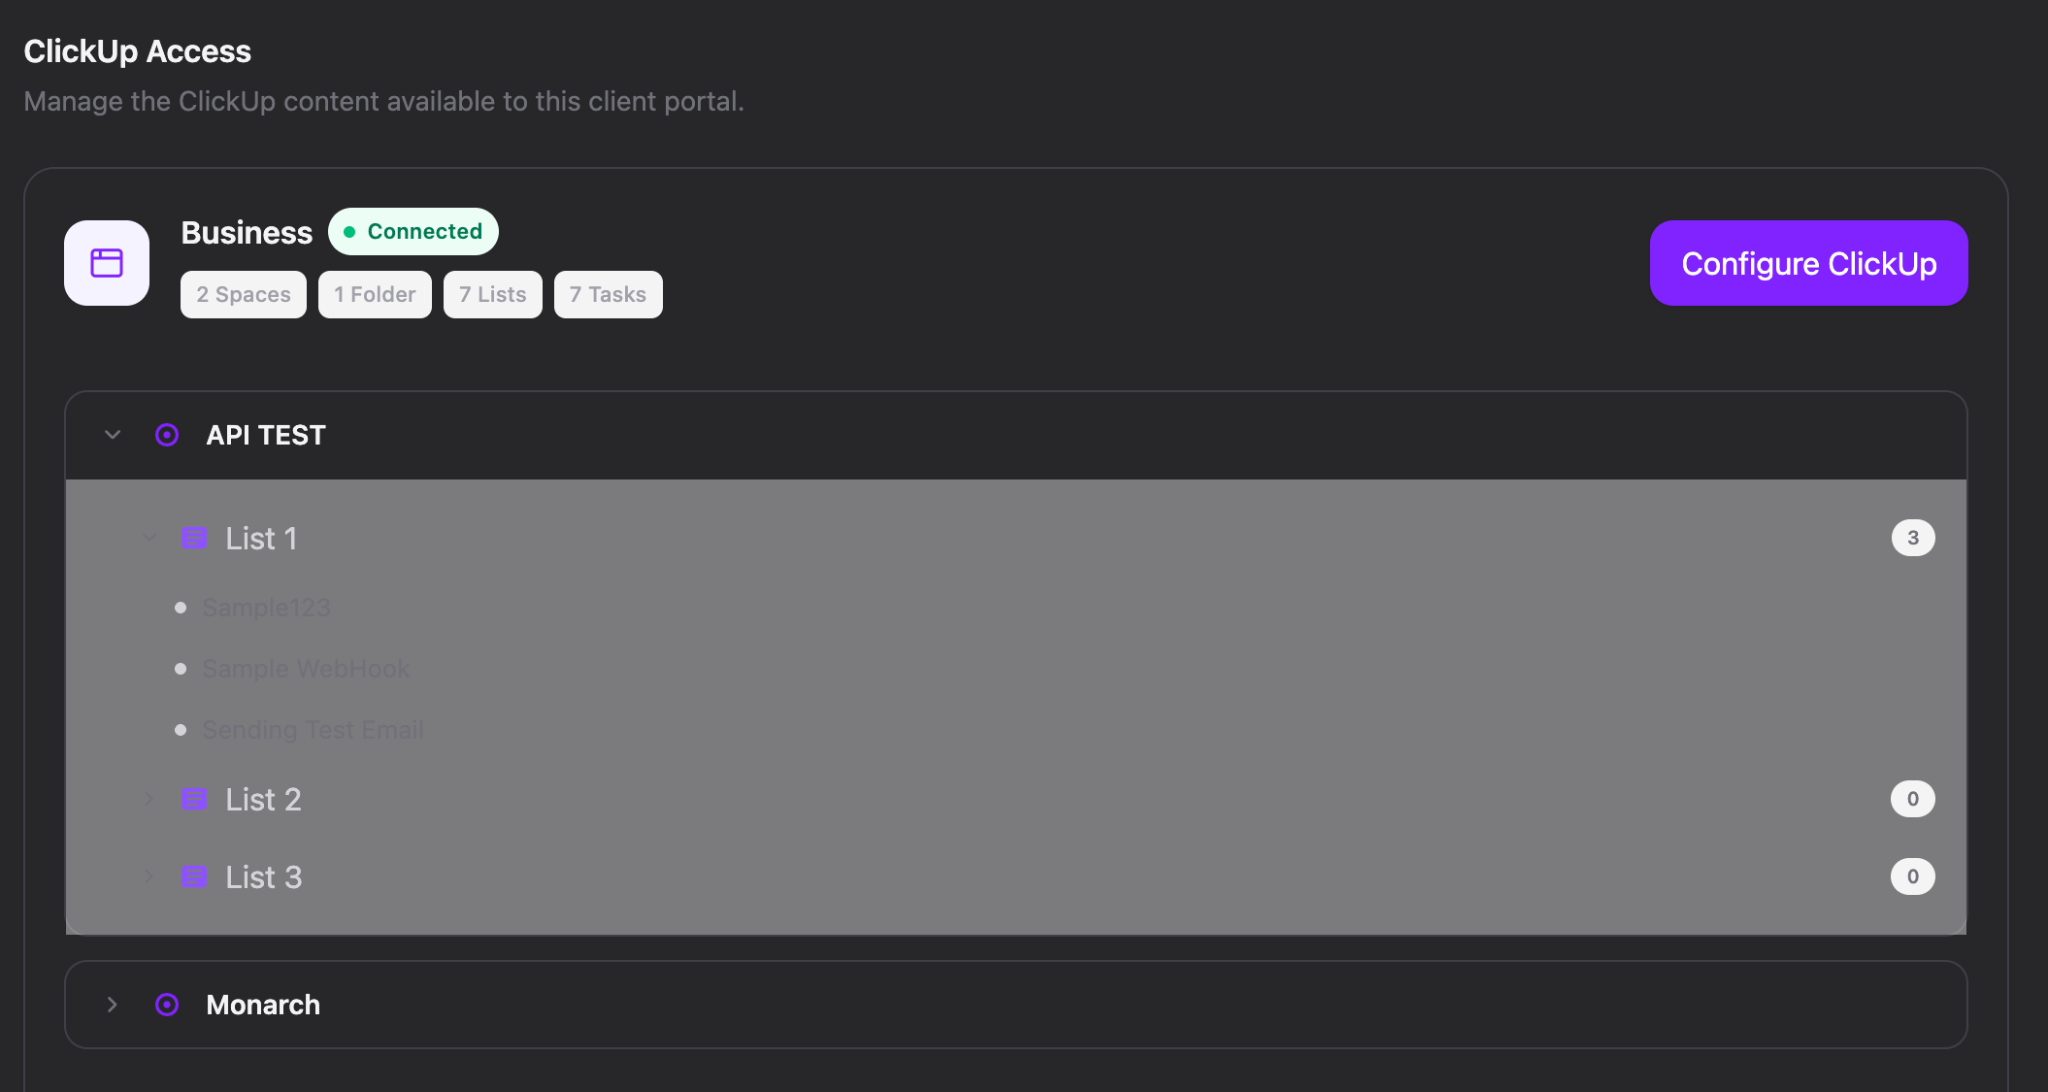
ClientDoq progressively narrows the ClickUp hierarchy used by a portal. Spaces provide the broadest selection, followed by folders and lists.
Select Tasks
After narrowing the available ClickUp structure, ClientDoq can use selected tasks for the portal. Task-level selection provides another layer of control when a list or folder contains internal work that should not be client-facing.
- Select the relevant ClickUp structure first.
- Use task selection when only specific tasks should be shared.
- Keep internal work outside the selected client-facing configuration.
Disconnect a ClickUp Workspace
Disconnecting a workspace removes the selected Spaces from the portal configuration while keeping the ClickUp authorization connected.
Sync and refresh ClickUp data
ClientDoq synchronizes the ClickUp information used by the portal. When troubleshooting missing or recently changed information, use the relevant refresh controls before changing configuration.
- Confirm the ClickUp authorization is still valid.
- Confirm the workspace, Space, Folder, List, or task is within the portal's selected hierarchy.
- Refresh the relevant ClickUp data.
- Recheck the portal configuration if the item still does not appear.
Portal overview
Each client portal has its own configuration and client-facing experience. The overview provides a place to understand the portal and move into its configuration areas.
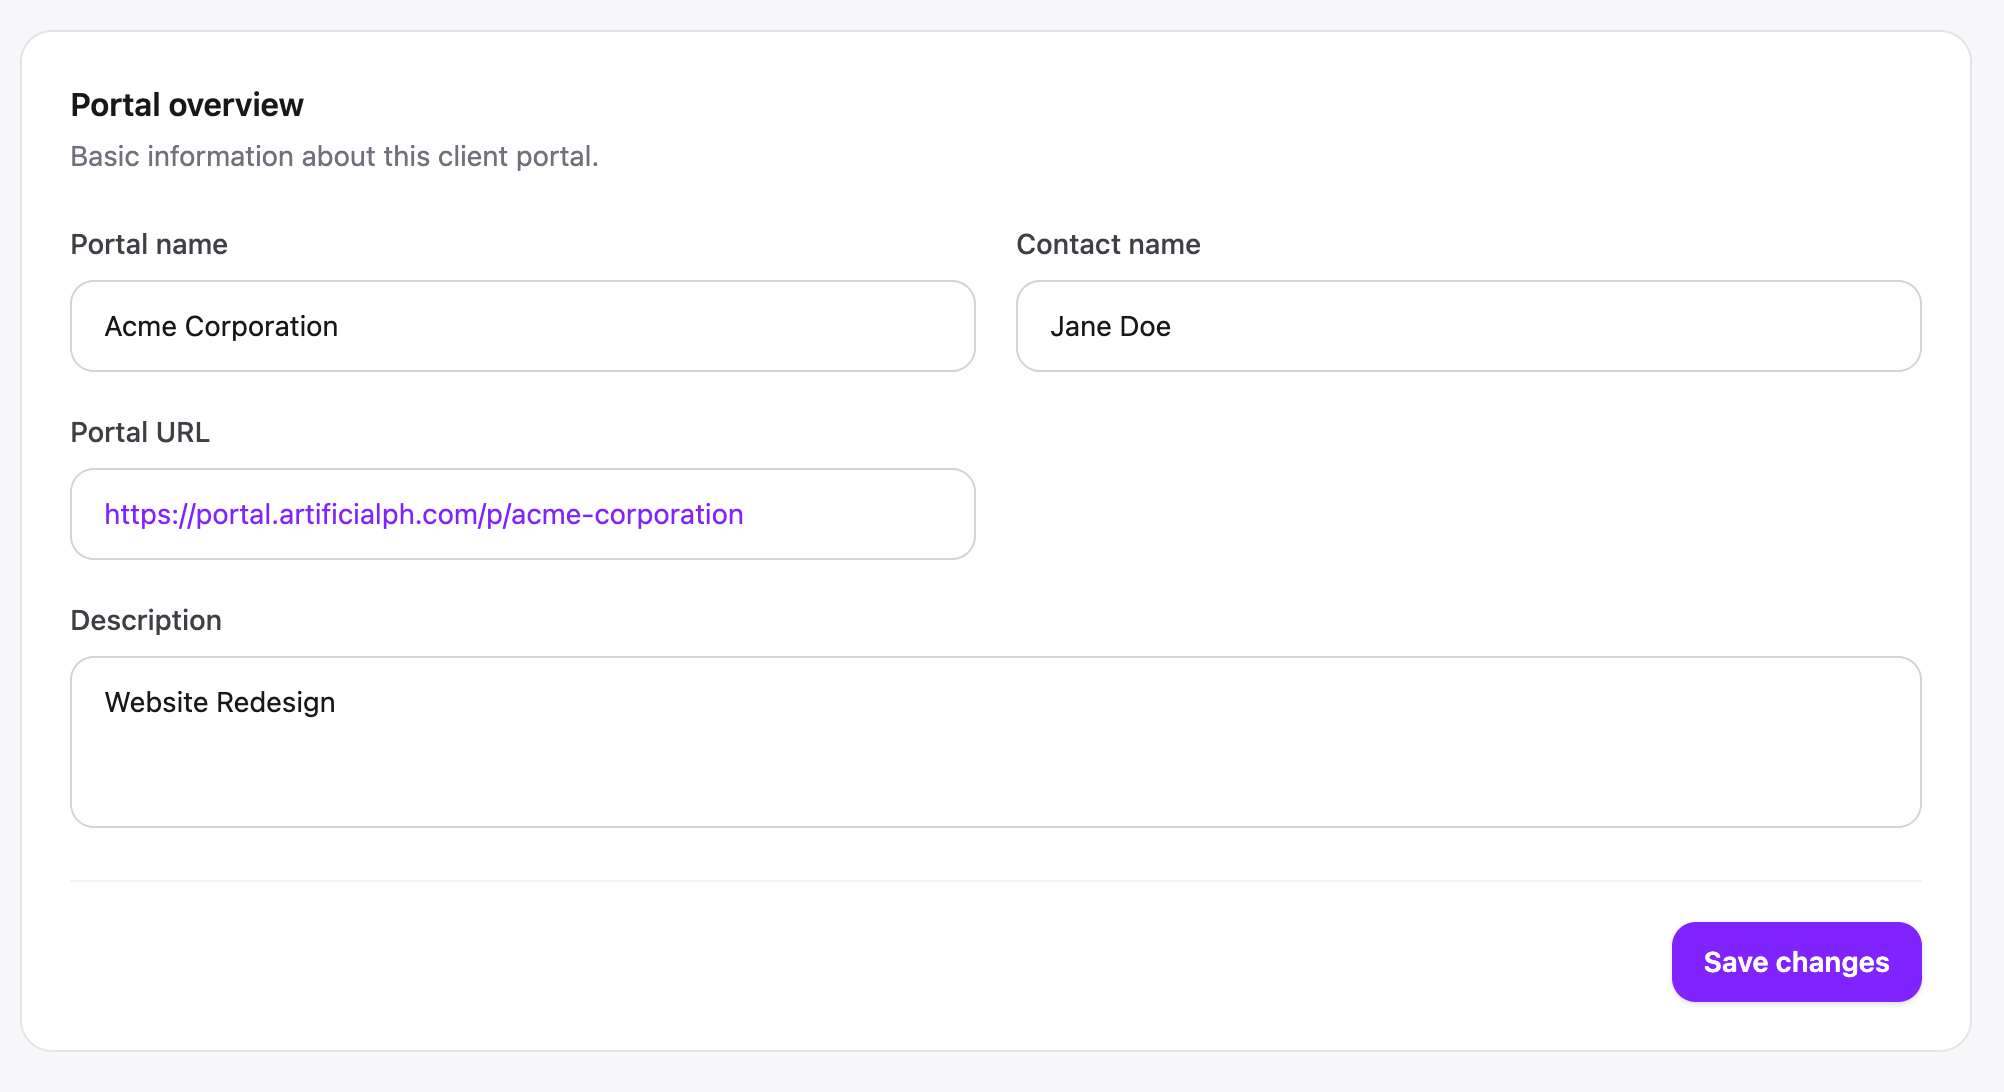
Portal settings
Portal settings control information such as the portal name, client contact, description, branding, and client-facing feature visibility.
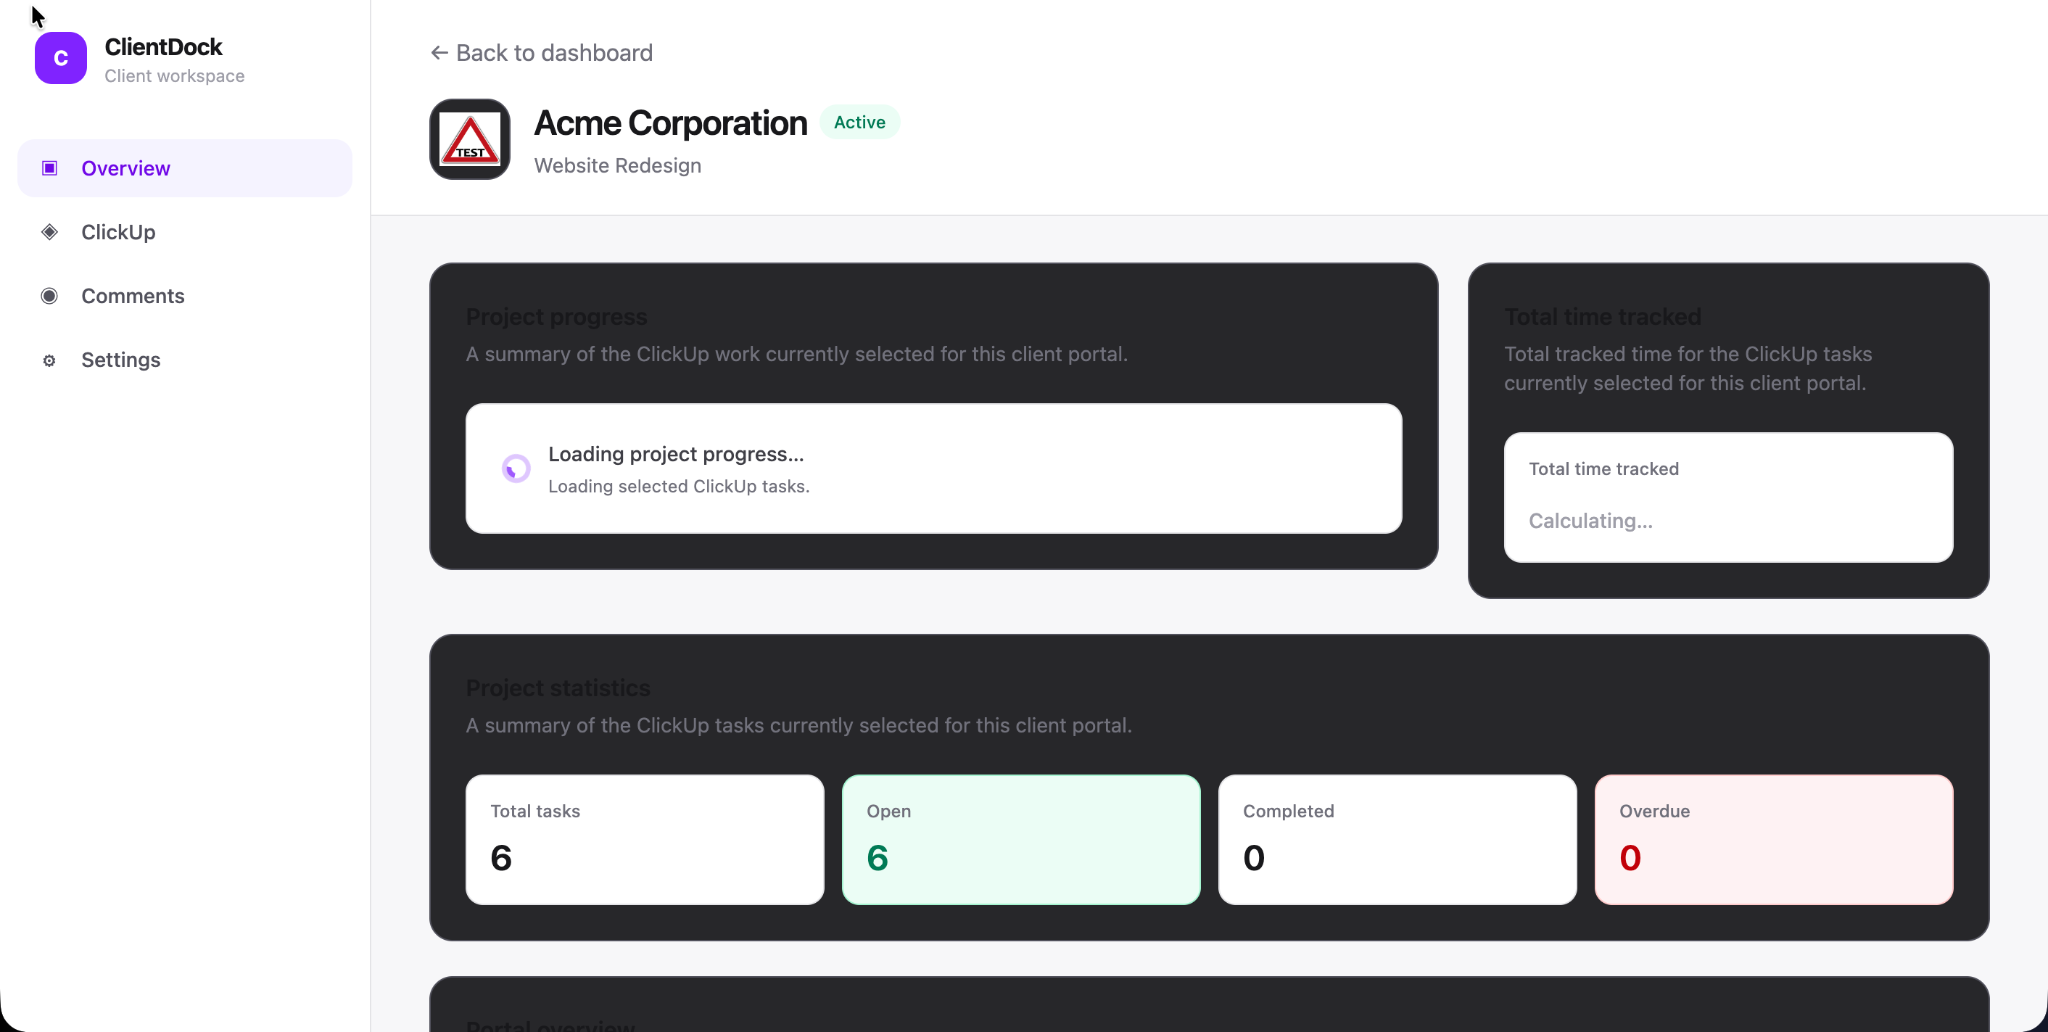
Customize portal branding
Customize the client-facing experience with portal information and visual identity.
- Set the portal name.
- Add a portal logo.
- Choose a primary color.
- Add a description or client contact information.
Control what clients see
ClientDoq is designed around controlled visibility. Your ClickUp workspace can contain internal work while each portal exposes only the information intended for that client.
Access layer
ClickUp authorization and workspace access determine what ClientDoq can retrieve.
Portal layer
Portal settings determine which shared data and features are client-facing.
Comment layer
Comments can be managed as internal or client-visible conversations.
Tasks and subtasks
Client portals can present selected ClickUp tasks and their project context without requiring the client to work directly inside your ClickUp workspace.
Use task selection when a complete list or folder contains work that should remain internal. Task records can include project context such as status, assignee, due date, list, folder, and Space information.
Project progress
When project progress is enabled for a portal, clients can get a concise view of how their work is moving without needing access to the full ClickUp environment.
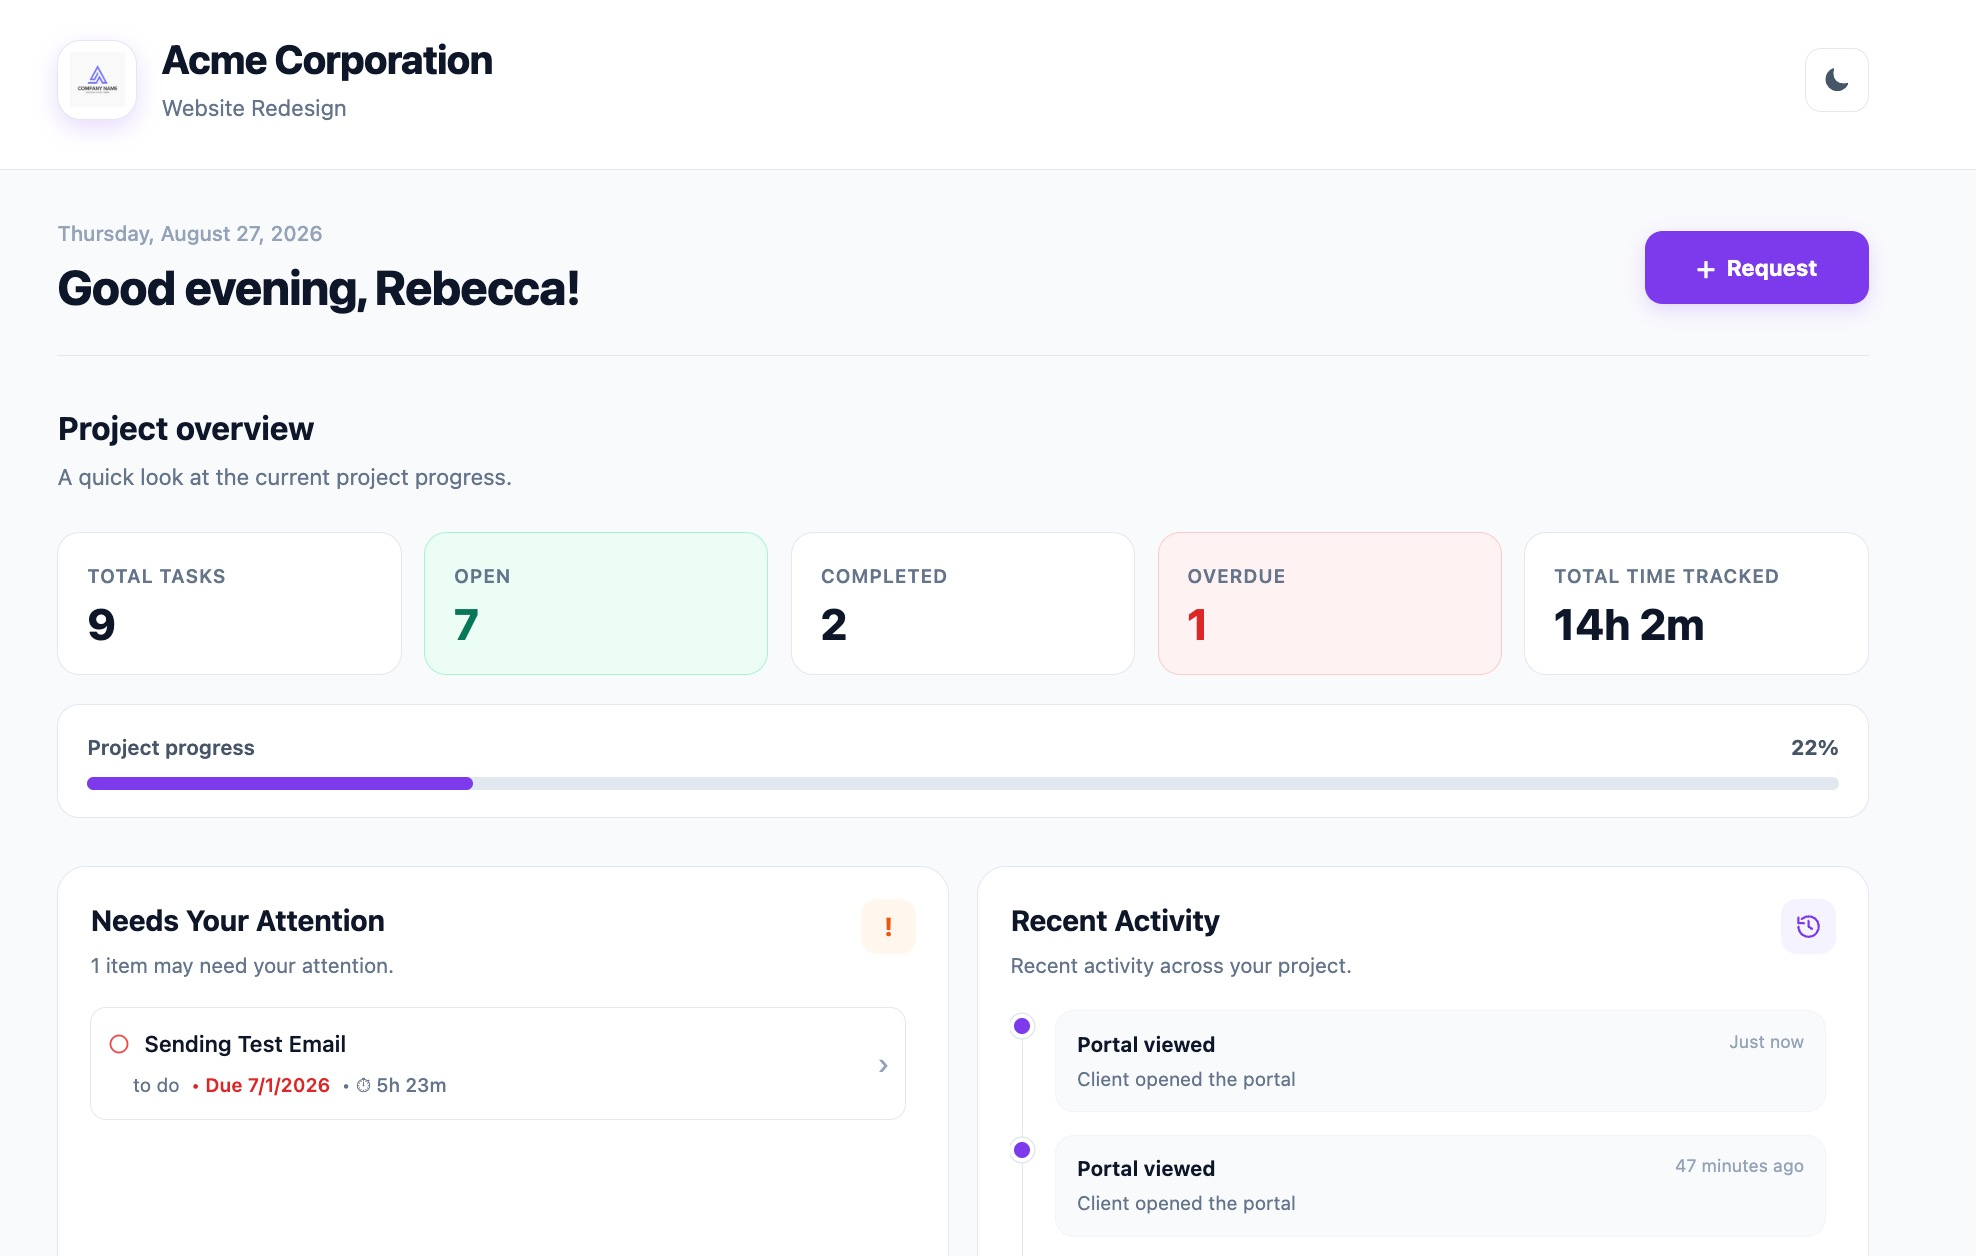
Project statistics
Project statistics are a separate portal visibility setting from project progress. Enable the feature when you want the client experience to surface the project's available summary statistics.
Task links
Task links can be enabled when you want clients to have a direct reference to the corresponding ClickUp task. This is configurable at the portal level.
Comments and collaboration
ClientDoq synchronizes ClickUp task comments into the portal experience. Admins can review comments, search and filter them, refresh them, manage visibility, track read state, and reply.
Client-visible
Comments intended for the client portal.
Internal
Comments kept inside the team's internal workflow.
Replies
Continue a conversation against the relevant comment.
Read state
Track which comments have been read or remain unread.
Search and filter comments
Use the comments view to find relevant conversations without manually scanning every comment.
- Search across available comment content and related task context.
- Filter comments by conversation state, including internal, client-visible, read, and unread.
- Refresh comments when recent ClickUp changes are not yet reflected.
Comment visibility
Admins can select comments and change their visibility between internal and client-visible states. This provides a safety layer for conversations that originate in the same ClickUp workflow but are not all intended for clients.
Read and unread comments
Comments have a read state that can be managed separately from visibility. Use read/unread state to keep track of conversations that still need attention.
Reply to comments
Replies stay associated with the original ClickUp comment. When sending a reply from ClientDoq, choose the visibility appropriate for the conversation.
Use replies to keep a client conversation attached to the relevant task rather than creating a disconnected communication thread.
Client requests
ClientDoq can provide a request workflow for clients to send new work requests through their portal. The request configuration determines where those requests are associated in ClickUp.
Configure the Request List
A portal can be configured with a specific ClickUp List as the destination for client requests. The selected List must belong to the portal's ClickUp Workspace.
- Open the portal configuration.
- Choose the ClickUp List used for incoming requests.
- Save the Request List configuration.
- Use a dedicated incoming-work List when possible so requests are easy for the team to identify.
Request List visibility
Request configuration includes a separate setting for whether clients can view the request List. This is distinct from the destination used to associate incoming requests in ClickUp.
Time tracking
Time tracking can be exposed through a client portal when enabled in the portal configuration. This allows the client experience to surface project time information without giving clients access to the complete ClickUp workspace.
What clients see
The client experience is intentionally narrower than the internal ClickUp workspace. Clients see the project information and portal features that your configuration exposes, rather than the complete workspace.
- Selected project and task information.
- Enabled progress and statistics.
- Client-visible comments and replies.
- Client request workflow when configured.
- Tracked time when enabled.
- Task links when enabled.
Portal URL
Each portal has its own slug and client-facing address. Use the portal's client-facing URL when directing a client to their workspace.
Client activity
ClientDoq records portal activity so admins can understand client interaction with the portal. Activity includes portal views and task-open events, and the dashboard can surface recent client activity.
- Portal viewed — records that a client opened the portal.
- Task opened — records that a client opened a task.
- Recent activity — review recent interactions from the admin experience.
Common issues
ClickUp authorization failed
Recheck the ClickUp connection and make sure the authorization is still valid. If access was revoked or changed in ClickUp, reconnect the authorization.
A workspace, Space, Folder, or List is missing
Confirm that the authorized ClickUp account can access the item. Then refresh the ClickUp data and review the portal's selected hierarchy.
A task is missing
Confirm that the task belongs to a selected List and that the task is included in the portal's selected task configuration when task-level selection is being used.
The client cannot see a comment
Check the comment's visibility. Internal comments are intentionally excluded from the client-visible conversation.
A request is not appearing where expected
Check that the portal has a Request List configured and that the selected List belongs to the portal's ClickUp Workspace.
Something changed in ClickUp but ClientDoq hasn't updated
Use the relevant refresh control first. If the issue persists, verify ClickUp authorization and the portal's configuration.
Clients see information they should not see
Review the portal's selected Spaces, Folders, Lists, and Tasks, then review feature visibility and comment visibility. Remember that authorization access and portal visibility are separate controls.
Security and privacy
ClientDoq is built around controlled client access: clients use a dedicated portal rather than being given access to your entire ClickUp workspace.
Read the complete Security overview and Privacy Policy.